Ultimate Guide - Mastering Canva Video Editor
Create Professional Videos in Minutes - No Design Skills Required
Getting Started: Setting Up Canva Video Editor
Begin by setting up your Canva account via email, Google, or Facebook.
Choose a subscription plan: Free, Pro, or Enterprise for advanced features.
Click on the “Create a Design” button in the top right corner,
You'll see a variety of presets for different types of content.
Select “Video” to get the perfect dimensions for your project. (1920x1080)
Exploring the Canva Interface: A User-Friendly Design
At the top, you'll find the menu bar with various editing options.
On the left, the design tab houses elements you can add to your projects.
At the bottom, you’ll see the timeline where all your clips will appear.
There's also a zoom slider at the bottom to adjust your working screen for better visibility.
In the bottom right, you’ll find the preview area. Clicking on it allows you to see your video in full screen.
Make sure you are in “durations view” rather than “slide view” for a proper timeline setup. This view is crucial for effective video editing.
Importing and Organizing Media: Your Content at Your Fingertips
Let’s bring in some footage! Click on “Upload” in the left panel, then select “Upload File.”
You can upload multiple files by holding the control key while clicking.
Canva also allows you to record directly into the editor by clicking “Record Yourself,” which is perfect for capturing video on the spot.
Once your videos are uploaded, simply drag them down to the timeline.
If your video doesn’t fit the canvas, you can resize it by clicking and dragging the corners until it fits perfectly.
To edit, click “Edit” at the top. A left menu will pop up, offering features like background removal and highlights.
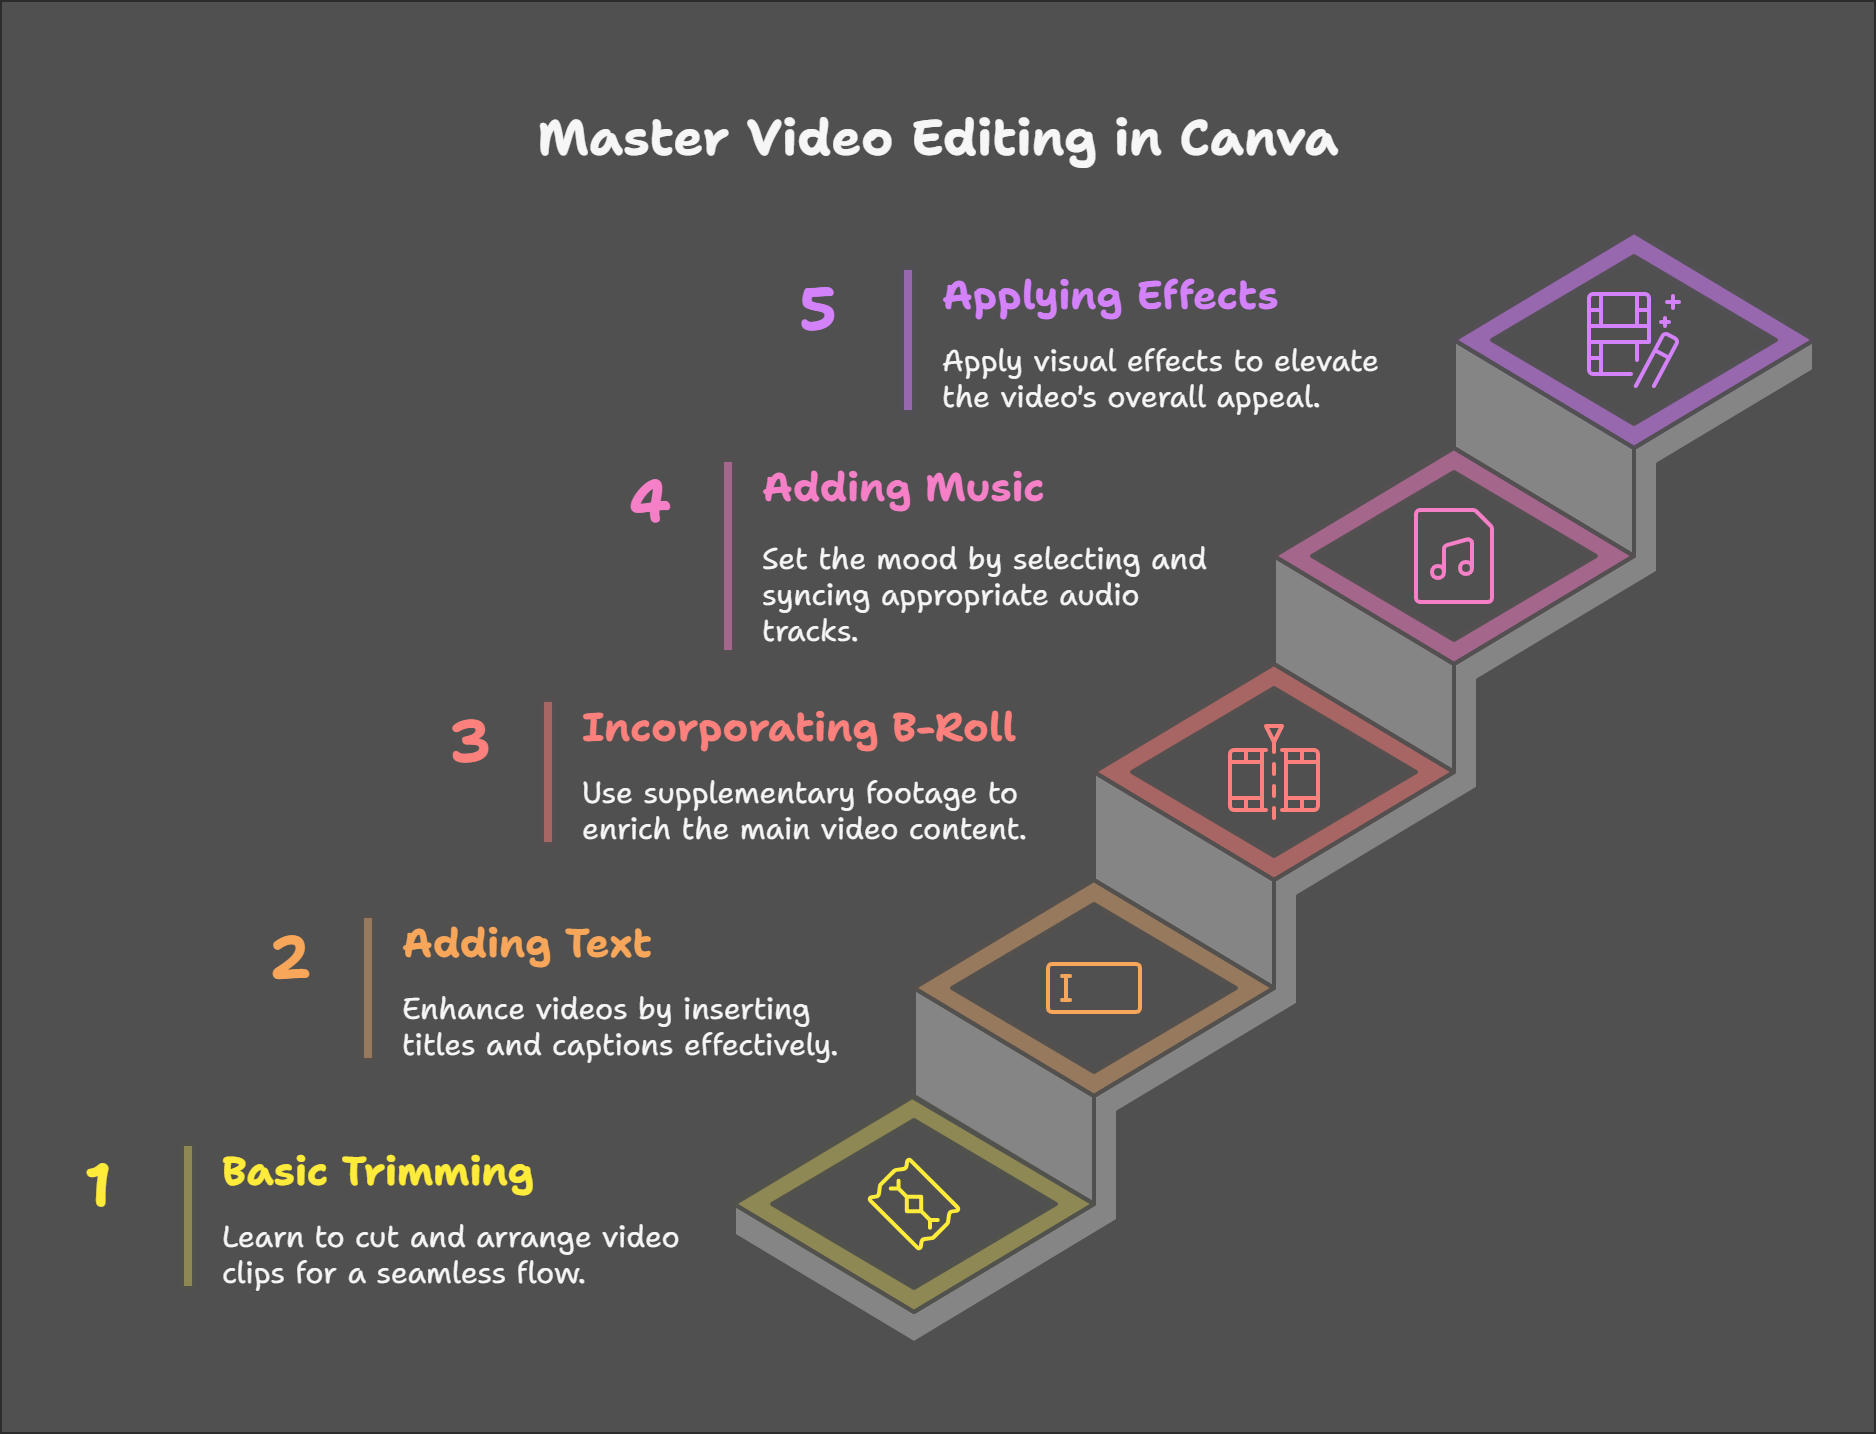
Trimming Clips: Three Methods
Trimming your clips is essential for creating a polished final video. There are three primary methods to trim clips in the Canva video editor:
Split Function: Move the playhead to where you want to make a cut, right-click, and select “Split Page,” or simply press 'S' on your keyboard. This creates two separate clips that you can delete or move independently.
Trim from the Edge: Hover your cursor over the beginning or end of the clip until you see the handle appear. Click and drag to adjust the clip length.
Using Audio as a Guide: Select your video, right-click, and choose “Extract Audio.” This reveals a separate audio track that shows your speaking patterns, making it easier to find and cut out awkward pauses.
Adding B-Roll and Overlays
Select the clip in your timeline where you want to add the overlay, then drag another video from your uploads into the canvas timeline.
You can either use your video or explore the Canva Elements library for additional options.
Be mindful that some elements may require a paid subscription, but there are plenty of free options available.
Resize the overlay clip and position it as needed while the original clip continues to play in the background.
Control how long the overlay appears by splitting your clips where you want the overlay to end, then deleting it from that section.
Text and Customization Techniques
Adding text is a crucial part of video editing, and the Canva video editor makes it easy.
Start by selecting the text option from the left menu.
You can choose from preset font combinations or create your own by "add a heading".
Once you’ve added text, customize it to match your style.
Change the font style, size, colour, and alignment using the options at the top.
For example, if you want a bold look, try using a font like Nowester.
To make your text stand out, explore the effects available.
You can apply drop shadows, and outlines, or even curve your text for a unique flair.
Animating your text adds an extra layer of engagement; options like fade or typewriting can bring your words to life.
Control how long your text appears on screen by splitting your clips or dragging the text in the timeline. This allows you to sync your text with your video content seamlessly.
Incorporating Graphics and Elements
To enhance your videos, adding graphics is essential.
Click on the elements tab in the left panel to browse through shapes, icons, and illustrations.
Search for what you need, and simply click to add it to your canvas.
Once added, you can resize and reposition your graphics just like text.
Don’t forget to animate them as well! This brings a dynamic feel to your video, making it more visually appealing.
Exploring Canva AI Features
The Canva AI tools are a game-changer for video editing.
For instance, if you need a specific element, the AI image generator can create it based on your description.
Just click the plus icon in the elements tab and start typing!
This feature isn't just for images; you can also generate graphics or video prompts.
However, keep in mind that there are limitations on free and pro versions, so plan accordingly.
After generating your desired elements, you can easily add them to your canvas. This flexibility opens up a world of creative possibilities!
Canva will direct save your images in your upload tab and you can reuse the image again and again.
Canva AI 🤖 tutorial for beginners 💝Check out the FREE Canva AI Prompt Guide https://earnwithdesign.com/free-canva-ai-prompt-guide/ that is able to help you create stunning designs effortlessly.
🚀 Unlock the Full Potential of Canva Dream Lab! 🌟🎁👉 100 Canva Dream Lab Prompt https://lead.earnwithdesign.com/canva-dream-lab-prompt
Transitions and Effects for Smooth Edits
Transitions are vital for creating a polished final product. Transitions create a fluid narrative, keeping the audience engaged.
Position your cursor between two clips in the timeline and click the arrow icon to select your preferred transition. Options like dissolves or slides can add flair to your edits.
Customize transition duration to match video pace and tone.
For a more professional look, consider zooming in slightly on clips instead of using transitions. This subtle change can maintain viewer engagement without being distracting.
Canva also offers various effects to apply to your clips.
Click on a clip, then select edit to explore filters and adjustments that can enhance the overall aesthetic of your video.
Audio Editing Essentials
Great audio is just as important as great visuals. Click on the audio tab to access free music tracks or upload your own. Browse Canva’s audio library for the perfect soundtrack.
Import voice recordings and align them with video sequences.
For a balanced audio experience, start with your music volume set between 20-30%.
To ensure your voice is clear, mute the music track temporarily.
Adjust the audio levels on your main clip first, then unmute and balance the music to complement your voice.
If you want more control, use the extract audio feature to separate your audio track. This allows for independent adjustments, making your editing process smoother.
Exporting Your Finished Video
Once you're satisfied with your edits, it’s time to export your masterpiece.
Export your video by clicking 'Download' and choosing file settings.
Canva will export your video at 1080p by default, perfect for platforms like YouTube.
If you want to export a specific section, you can select specific pages. Just click on the arrow next to the pages and tick the ones you want to export.
Additionally, Canva offers direct sharing options to platforms like Facebook, Instagram, and TikTok. You can even save your video to cloud storage services like Google Drive or Dropbox.
🎨💸 Check out my 'How to Make Money Online with Canva' series for step-by-step guides and insider tips on how you can start earning today with simple, sellable designs!"🎨💸
🚀 MY FAVORITE BUSINESS TOOLS 🚀
LeadCreator (Lead Creation Tools):https://earnwithdesign.com/leadcreator
VidIQ (YouTube SEO):https://vidiq.com/rachelyeong
System.io : https://earnwithdesign.com/systeme
Creative Fabrica (Templates):https://earnwithdesign.com/creativefabrica
Hostinger (Hosting):https://earnwithdesign.com/hostinger
Get Response (Email Marketing):https://earnwithdesign.com/getresponse
Capcut (Video Editing):https://earnwithdesign.com/capcut
Kittl (Online Design Tools):https://www.kittl.com/invite/rachelyeong
Appsumo (Business Software):http://appsumo.8odi.net/GmP57B
Tailwind (Pinterest Scheduler):http://tailwind.sjv.io/rQA3K5
Pinclicks (Pinterest Analytic):https://www.pinclicks.com/?ref=rachelyeong
Pin Generator (Bulk Pin & Schedule Pin) :https://pingenerator.com?pgref=rachelyeong
SEOWrittingAI (AI Blog) : https://seowriting.ai?fp_ref=yeong-paik-looi82
Pin Inspector https://paykstrt.com/29582/159248
Post Planner: https://www.postplanner.com/?via=paik-looi
App Sumo (One Time Paid Software) http://appsumo.8odi.net/GmP57B
💞 CONNECT WITH ME 💞
Official website: https://earnwithdesign.com/
Youtube: https://www.youtube.com/@RachelYeong
Facebook: https://www.facebook.com/earnwithdesign
Pinterest: https://www.pinterest.com/earnwithdesign/